![]()
VPC Peering
Project Link: View Project
Author: Duc Thai
Email: ducthai060501@gmail.com
VPC Peering
Introducing Today's Project!
What is Amazon VPC?
Amazon VPC is a virtual private network in AWS that you control, where you can define IP ranges, subnets, route tables, and security settings. It is useful because it allows you to isolate and secure resources, control how servers communicate with each other and the internet, and manage your cloud network efficiently.
How I used Amazon VPC in this project
In today's project, I used Amazon VPC to create two separate networks, launch EC2 instances in each, and control how they communicate. I configured subnets, route tables, security groups, and NACLs to secure resources, allow the public server to access the internet, and enable the two VPCs to communicate through a peering connection. This helped me test connectivity between instances and understand how VPC manages traffic and security.
One thing I didn't expect in this project was...
One thing I didn’t expect in this project was how many small settings could block connectivity—like security group rules, NACLs, or route tables. Even minor misconfigurations could prevent SSH, ping, or internet access, which showed me that careful planning and troubleshooting are very important in AWS networking.
This project took me...
This project took me 90 minutes.
In the first part of my project...
Step 1 - Set up my VPC
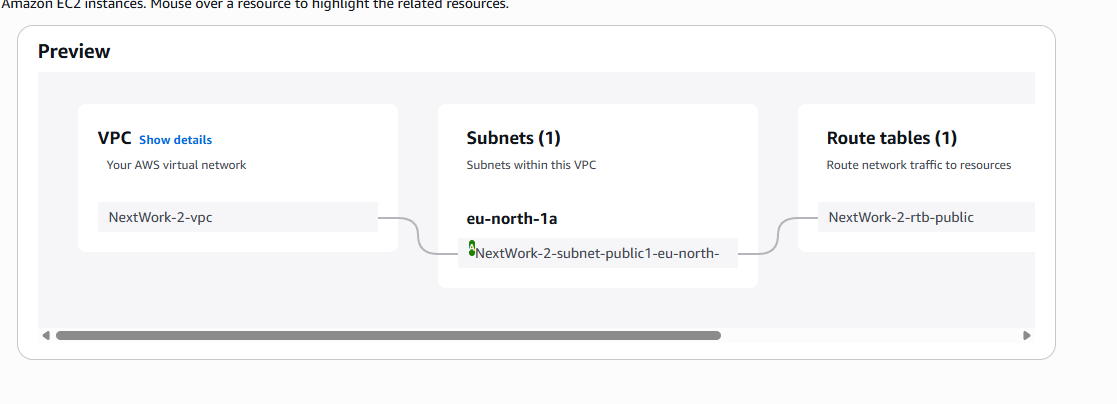
In this step, I will create two VPCs using the VPC resource map because it helps me visually design and organize the network setup. The resource map makes it easier to see how subnets, route tables, and gateways connect within each VPC, ensuring I build both networks correctly before setting up VPC peering.
Step 2 - Create a Peering Connection
In this step, I will set up a connection link between my two VPCs because I want them to communicate securely and directly without using the public internet. This connection, called VPC peering, allows resources in both VPCs to share data and services while keeping the traffic private within AWS’s internal network.
Step 3 - Update Route Tables
In this step, I will modify the route tables in my two VPCs to set up a way for traffic from VPC 1 to reach VPC 2 and vice versa because, even after creating a peering connection, the VPCs won’t automatically know how to send traffic to each other. Updating the route tables makes sure that network traffic between them is properly directed through the peering connection.
Step 4 - Launch EC2 Instances
In this step, I will launch one EC2 instance in each of my VPCs because I want to use them to test the VPC peering connection. By having instances in both VPCs, I can check if they can communicate with each other securely through the peering link.
Multi-VPC Architecture
In this step, I launched two VPCs with different IPv4 CIDR blocks: 10.1.0.0/16 and 10.2.0.0/16. Each VPC has one public subnet, which allows me to test connectivity between them later when setting up VPC peering.
The IPv4 CIDR blocks for VPCs 1 and 2 are unique because each VPC needs its own non-overlapping IP address range to communicate properly. If the CIDR blocks were the same, the networks wouldn’t know where to send traffic, causing routing conflicts. Unique CIDR blocks ensure smooth and clear communication between VPCs, especially when setting up VPC peering.
I also launched 2 EC2 instances
I didn’t set up key pairs for these EC2 instances because I learned that with EC2 Instance Connect, AWS automatically manages a key pair for us. We don’t need to create or manage our own keys. Since we already practiced setting up key pairs in the previous projects, it wasn’t necessary to do it again this time.
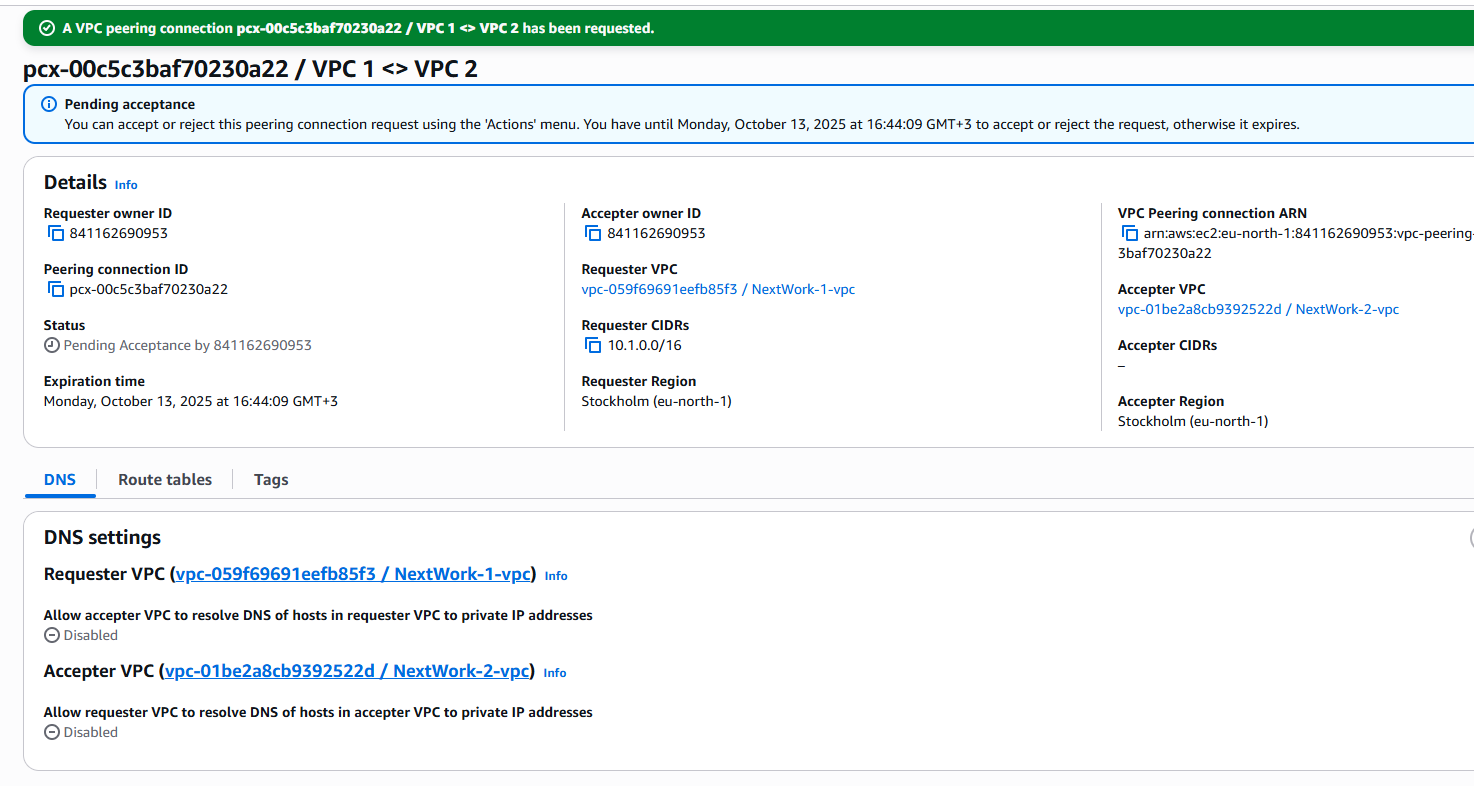
VPC Peering
A VPC peering connection is a secure, private network link between two Virtual Private Clouds (VPCs). It allows resources in both VPCs—like EC2 instances—to communicate with each other as if they were in the same network. The traffic stays inside AWS’s internal network, not the public internet, making it both fast and secure.
VPCs would use peering connections to let different VPCs communicate securely and efficiently without using the public internet. They’re useful when you have separate VPCs for different environments, teams, or regions but still need them to share data, services, or applications. Peering keeps the traffic private, low-latency, and cost-effective within AWS’s internal network.
The difference between a Requester and an Accepter in a VPC peering connection is who starts and who approves the connection. The Requester is the VPC that sends the peering request, while the Accepter is the VPC that receives and approves it. Once the Accepter accepts the request, the two VPCs are linked and can communicate securely through the peering connection.

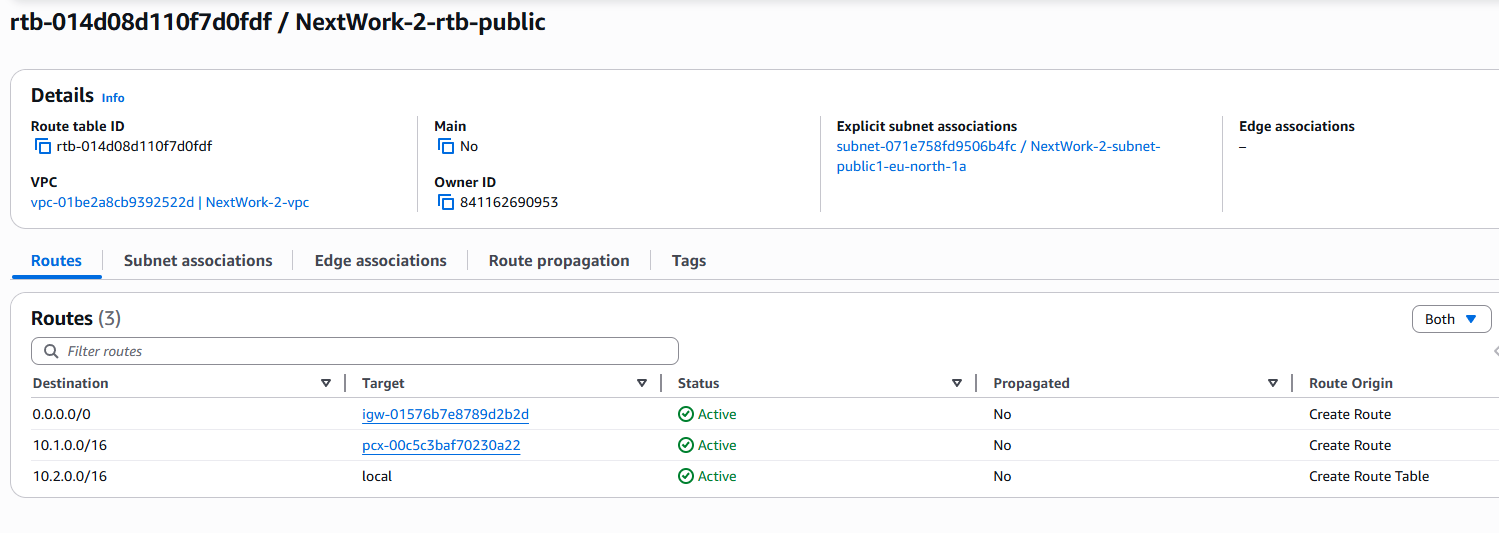
Updating route tables
After accepting a peering connection, my VPCs' route tables need to be updated because, by default, the VPCs don’t know how to send traffic to each other. Adding a new route tells each VPC where to send traffic destined for the other VPC and through which peering connection. This ensures that resources in both VPCs can communicate securely and correctly.
My VPCs' new routes have a destination of the other VPC’s CIDR block ( 10.2.0.0/16 for VPC 1, and 10.1.0.0/16 for VPC 2). The routes' target was the VPC peering connection ID pcx-xxxxxxxx). This setup allows traffic to flow between the two VPCs through the peering connection.
In the second part of my project...
Step 5 - Use EC2 Instance Connect
In this step, I will use EC2 Instance Connect to connect to my first EC2 instance and troubleshoot any connection issues because I need to ensure that the instance is accessible and properly configured. This helps me verify that the network settings, security groups, and VPC peering are working correctly before testing communication between the VPCs.
Step 6 - Connect to EC2 Instance 1
In this step, I will use EC2 Instance Connect to connect to Instance 1 one more time because the IP address issues have been resolved with the Elastic IP. Now the instance is publicly reachable, allowing me to securely access it via SSH and continue testing connectivity with the other VPC and the internet.
Step 7 - Test VPC Peering
In this step, I will get Instance 1 to send test messages to Instance 2 and solve any connection errors until Instance 2 can send messages back because I need to verify that the VPC peering connection and route tables are correctly set up. This ensures that both instances can communicate securely and reliably across the two VPCs.
Troubleshooting Instance Connect
After allocating an Elastic IP and associating it with the first EC2 instance, I used EC2 Instance Connect to securely log in to the instance via SSH. This allowed me to access the server directly, verify its configuration, and test connectivity to the other VPC and the internet.
I was stopped from using EC2 Instance Connect as because the instance was not accessible from the internet. Without a public IP, there’s no way for the SSH connection to reach the instance from outside the VPC, so EC2 Instance Connect could not establish a session.

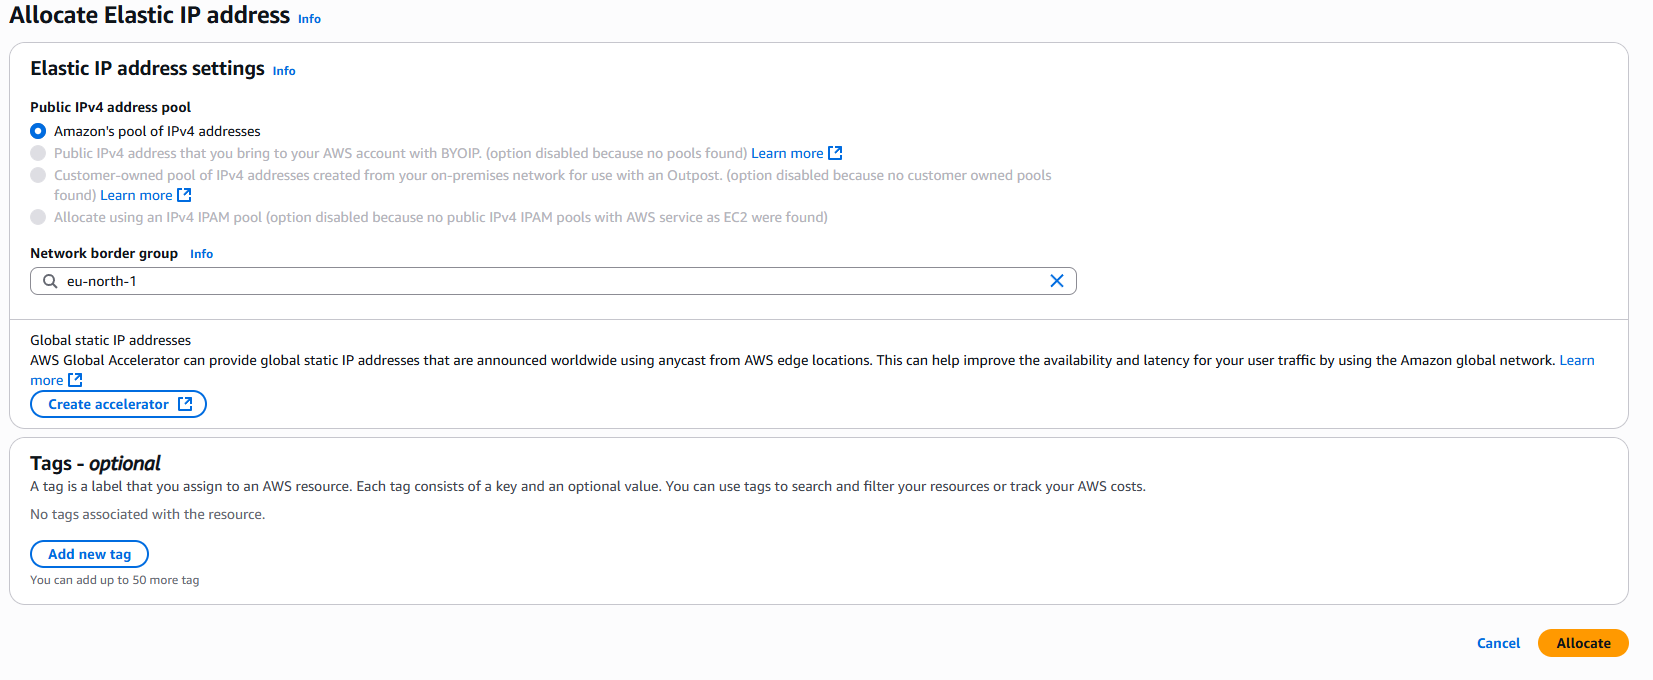
Elastic IP addresses
To resolve this error, I set up Elastic IP addresses. Elastic IP addresses are static public IPv4 addresses provided by AWS that you can assign to your EC2 instances. They allow your instance to be reachable from the internet, even if it stops or restarts, ensuring a consistent IP address for SSH, web access, or other services.
Associating an Elastic IP address resolved the error because it gave my EC2 instance a public, static IP address that is reachable from the internet. This allowed EC2 Instance Connect to establish an SSH connection, letting me access the instance directly.
Troubleshooting ping issues
To test VPC peering, I ran the command:
ping 10.2.4.95
This sent test packets from Instance 1 in VPC 1 to Instance 2 in VPC 2. Receiving replies confirmed that the VPC peering connection and route tables were set up correctly and that the instances could communicate across the peered VPCs.
A successful ping test would validate my VPC peering connection because it shows that network traffic can flow between instances in the two VPCs. If the ping gets a response, it confirms that the peering connection, route tables, and security settings are correctly configured, allowing the VPCs to communicate privately and securely.
I had to update my second EC2 instance's security group because it did not allow any ICMP traffic from outside. I added a new inbound rule to allow ICMP (ping) from the first instance’s IP address or VPC CIDR block, which enabled the two instances to communicate and complete the VPC peering test successfully.
